


Table of contents
Abstract
Cloudwatch evidently - Safely launch new features and validates web application choices by conducting online experiments and then deciding if your experiment should be terminated depending on the results of the experiment.
In this post, we try the feature flag control for the user who performed the login process using Cognito. It leverages the CDK typescript to provide
cloudwatch evidentlyprojects, features, launches and experiments, also using AWS Amplify to provide a web app and login method using Amazon cognito authentication and cognito identity pool
Table Of Contents
🚀 Overview of Cloudwatch evidently
You can use Amazon CloudWatch Evidently to safely validate new features by serving them to a specified percentage of your users while you roll out the feature. You can monitor the performance of the new feature to help you decide when to ramp up traffic to your users. This helps you reduce risk and identify unintended consequences before you fully launch the feature.
Evidently structure
Project: The logical object in Evidently that can contain features, launches, and experiments. Use projects to group similar features together. We can store evaluation events for long term storage by using cloudwatch log or S3 bucket
Feature: represents a feature that you want to launch or that you want to test variations of.
Launch: To expose a new feature or change to a specified percentage of your users, create a launch
Experiment: Use experiments to test different versions of a feature or website and collect data from real user sessions. This way, you can make choices for your application based on evidence and data

🚀 Create cloudwatch evidently project and its features, launches and experiments
First, we create a project for the application feature and store evaluation events in S3 bucket. For CDK, at the time of writing this, there's only L1 construct
    const s3 = new Bucket(this, `${prefix}-evidently-demo-data-storage`, {
      bucketName: `${prefix}-evidently-demo-data-storage`,
      blockPublicAccess: BlockPublicAccess.BLOCK_ALL,
      encryption: BucketEncryption.S3_MANAGED,
      removalPolicy: RemovalPolicy.DESTROY,
      enforceSSL: true
    });

    const proj = new CfnProject(this, `${prefix}-evidently-demo`, {
      description: 'S3 bucket to store evidently project evaluation events',
      name: `${prefix}-evidently-demo`,
      dataDelivery: {
        s3: {bucketName: s3.bucketName}
      },
      tags: InsideTags('evidently', reg)
    });
Create a feature for the project. The feature use
Variation type : Booleanwith 2 variationsVariation1: falseandVariation2: truerepresent for enabling or disabling the feature or in other words display/hide or on/off feature on the applicationconst feature = new CfnFeature(this, `${prefix}-evaluation-demo`, { description: 'Evaluation-demo feature', name: `${prefix}-evaluation-demo`, project: proj.name, variations: [ {booleanValue: false, variationName: 'Variation1'}, {booleanValue: true, variationName: 'Variation2'} ], defaultVariation: 'Variation1', evaluationStrategy: 'ALL_RULES', tags: InsideTags('evidently', reg) }); feature.node.addDependency(proj);Create launch: split Variation and traffic to 20% and 80%, set start now and add the launch to the feature
    const launch = new CfnLaunch(this, `${prefix}-launch-test`, {
      name: `${prefix}-launch-test`,
      project: proj.attrArn,
      groups: [
        {
          groupName: 'test-launch-1',
          feature: feature.name,
          variation: 'Variation1'
        },
        {
          groupName: 'test-launch-2',
          feature: feature.name,
          variation: 'Variation2'
        }
      ],
      scheduledSplitsConfig: [
        {
          groupWeights: [
            {
              groupName: 'test-launch-1',
              splitWeight: 20000,
            },
            {
              groupName: 'test-launch-2',
              splitWeight: 80000,
            },
          ],
          startTime: new Date().toISOString()
        }
      ],
      executionStatus: {status: 'START'},
      tags: InsideTags('evidently', reg)
    });
    launch.node.addDependency(feature);
🚀 Building Evidently Metrics
Metrics are defined by applying rules to data events. We use
putProjectEventsto sends performance events to Evidently. These events can be used to evaluate a launch or an experiment.Evidently collects experiment data and analyzes it by statistical methods, and provides clear recommendations about which variations perform better.
To make a demo of this, We create a new feature similar to the above and create an experiment associated with the feature. The experiment includes the following properties
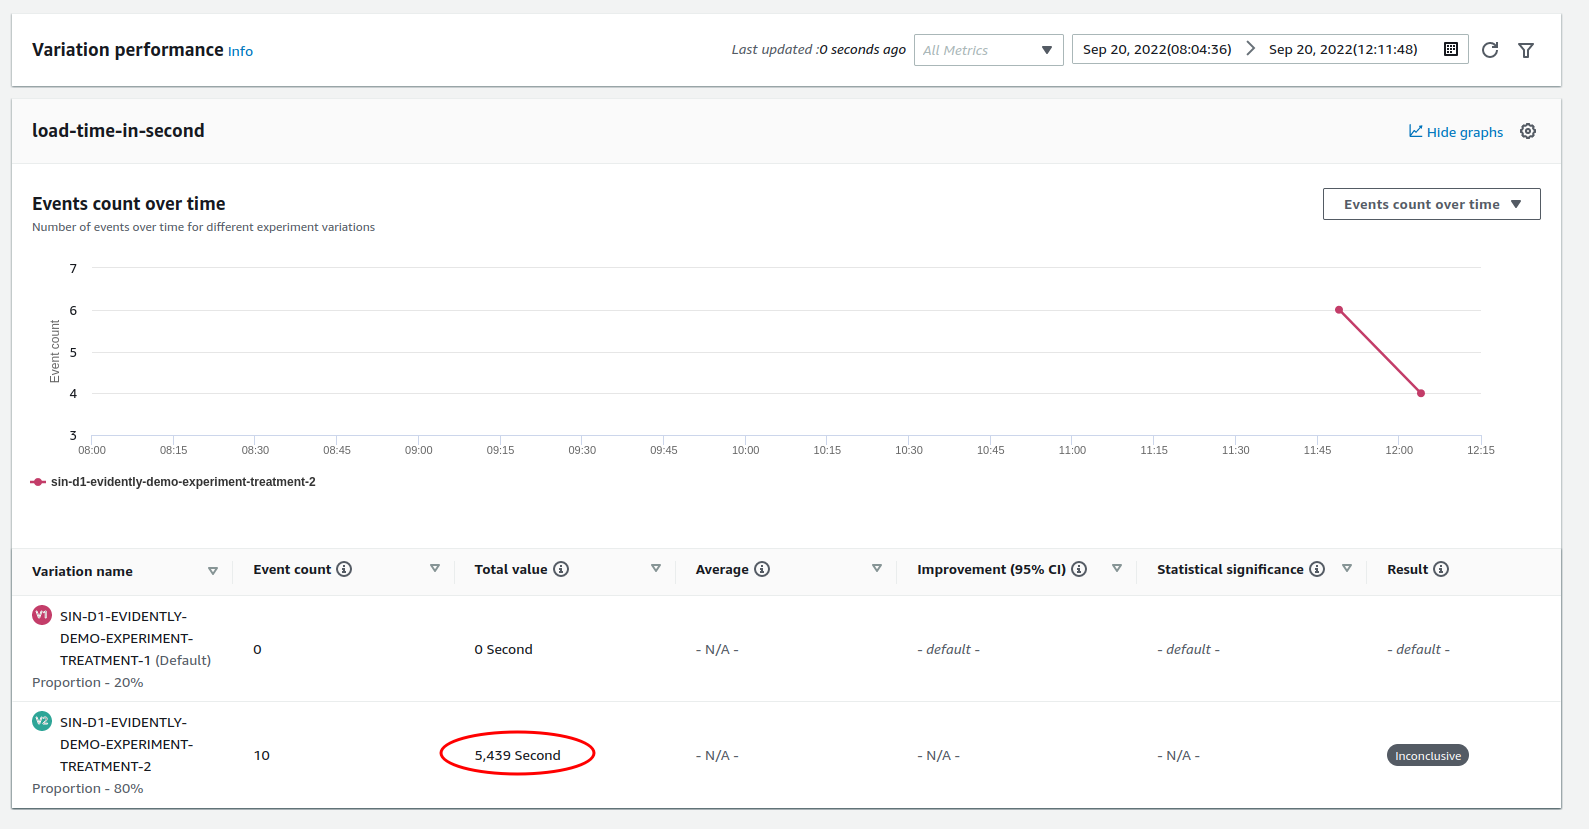
metricGoalswith
desiredChangeset toINCREASEmeans that a variation with a higher number for this metric is performing better.The goal references the custom metric and the metric rule based on the
eventPatternwhich is sent fromputProjectEvents.The rule
  {
    "entityIdKey": "entityId",
    "valueKey": "details.loadTime",
    "eventPattern": {
      "entityId": [
        {
          "exists": true
        }
      ],
      "details.loadTime": [
        {
          "exists": true
        }
      ]
    }
  }
The event payload sent from the application in the evaluation process
  const _data = {
    entityId: user.username,
    details: {
      loadTime: elapse,
    }
  };

  const _event = {
    data: JSON.stringify(_data),
    timestamp: new Date(),
    type: 'aws.evidently.evaluation'
  }
onlineAbConfigdefines treatment with specifiedsplitWeight, total treatments must be 100%treatmentsassociates treatments defined above with the feature and according to variantSource code
    const featureExp = new CfnFeature(this, `${prefix}-evaluation-exp`, {
      description: 'Evaluation-demo feature exp',
      name: `${prefix}-evaluation-exp`,
      project: proj.name,
      variations: [
        {booleanValue: false, variationName: 'Variation1'},
        {booleanValue: true, variationName: 'Variation2'}
      ],
      defaultVariation: 'Variation1',
      evaluationStrategy: 'ALL_RULES',
      tags: InsideTags('evidently', reg)
    });
    featureExp.node.addDependency(proj);

    const exp = new CfnExperiment(this, `${prefix}-experiment`, {
      name: `${prefix}-experiment`,
      project: proj.name,
      description: 'Test experiment',
      metricGoals: [{
        desiredChange: 'INCREASE',
        entityIdKey: 'entityId',
        metricName: 'load-time-in-second',
        eventPattern: JSON.stringify(eventPattern),
        valueKey: "details.loadTime"
      }],
      onlineAbConfig: {
        controlTreatmentName: `${prefix}-experiment-treatment-1`,
        treatmentWeights: [
          {
            splitWeight: 20000,
            treatment: `${prefix}-experiment-treatment-1`
          },
          {
            splitWeight: 80000,
            treatment: `${prefix}-experiment-treatment-2`
          }
        ]
      },
      treatments: [
        {
          treatmentName: `${prefix}-experiment-treatment-1`,
          feature: featureExp.name,
          variation: 'Variation1'
        },
        {
          treatmentName: `${prefix}-experiment-treatment-2`,
          feature: featureExp.name,
          variation: 'Variation2'
        }
      ],
      runningStatus: {
        status: 'START',
        analysisCompleteTime: '2022-09-27T06:47:03.387Z'
      }
    });
    exp.node.addDependency(featureExp)
🚀 Deploy cloudwatch evidently stack
The source code is ready, we now deploy the stack to create
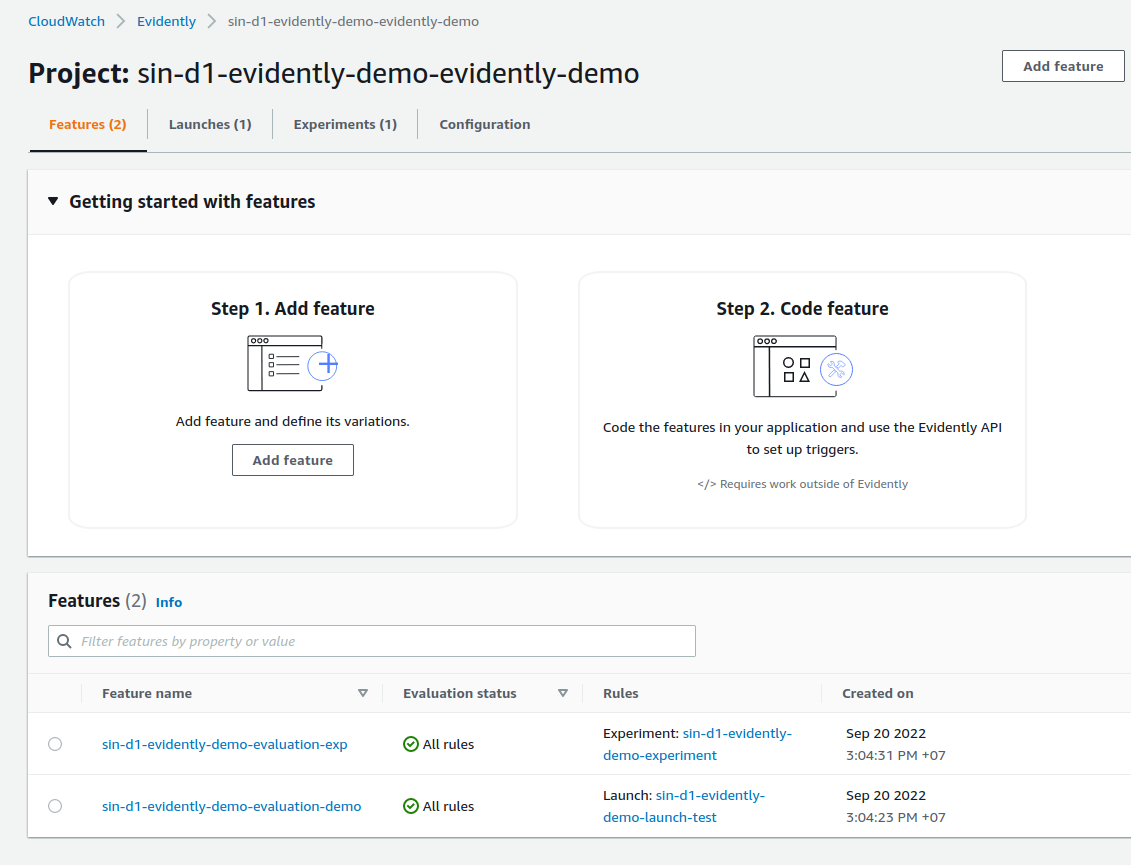
cloudwatch evidentlyproject, feature and start the launchcdk deploy CloudwatchEvidentlyStack --profile mfa --concurrency 2 --require-approval neverCheck the project created which has 2 features, 1 launch and 1 experiment
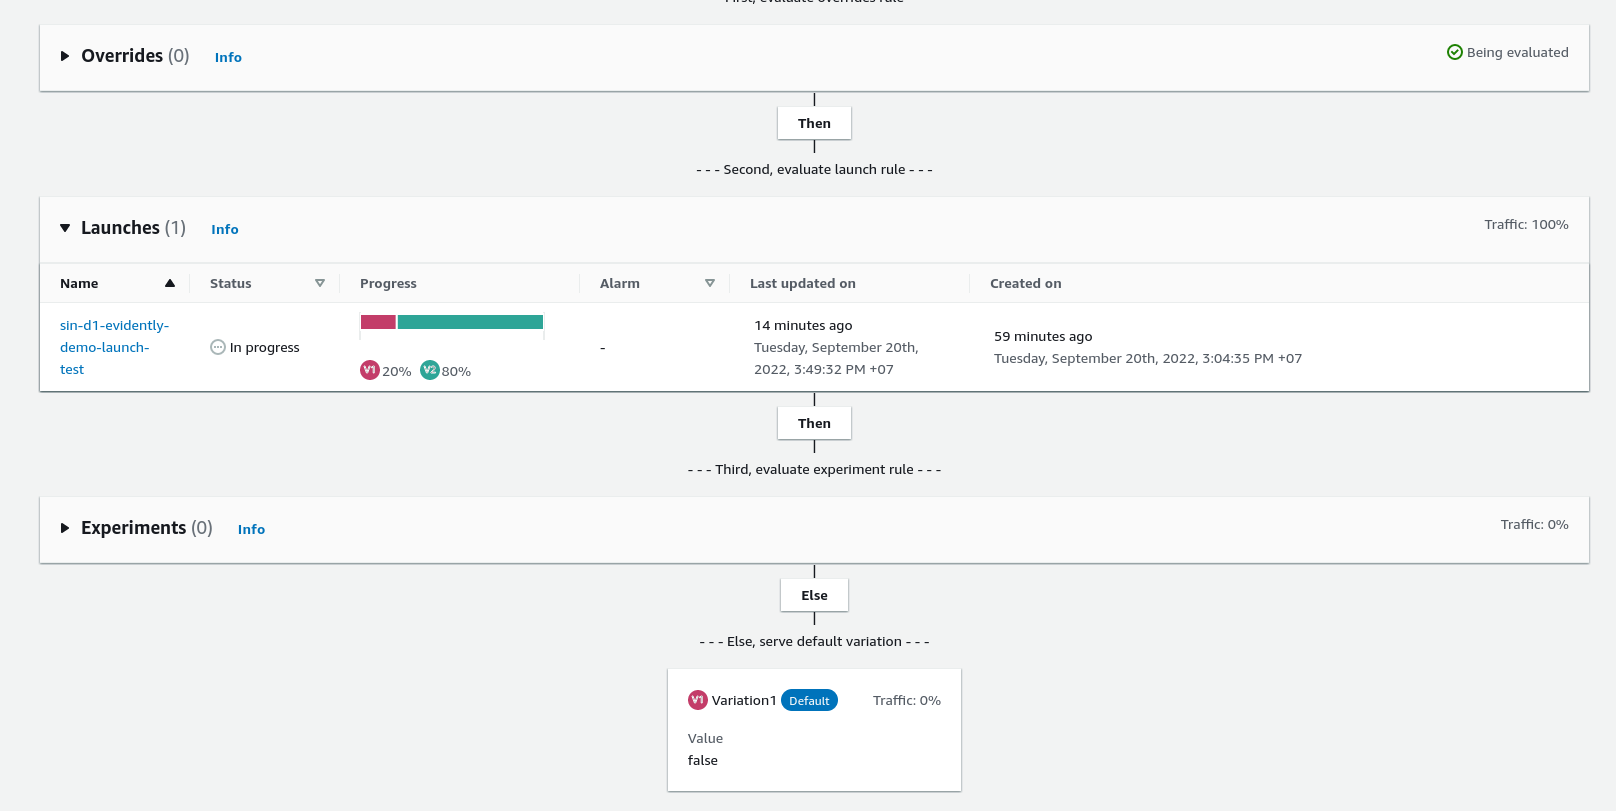
Feature demo rule orders: launches -> default
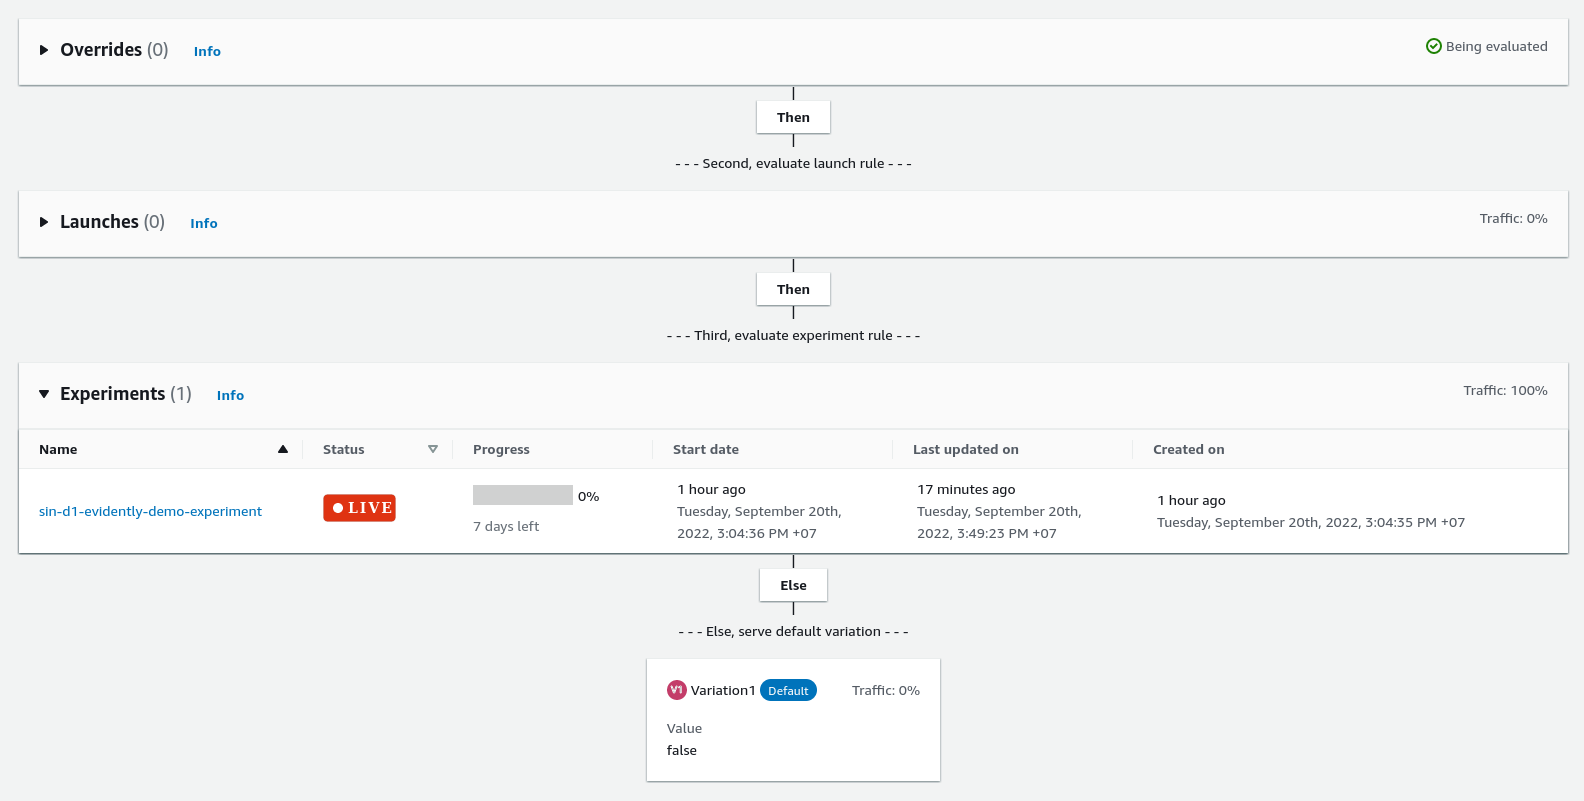
Feature with experiment
🚀 Use Amplify to start webapp for testing evidently
AWS Amplify is a complete solution that lets frontend web and mobile developers easily build, ship, and host full-stack applications on AWS, with the flexibility to leverage the breadth of AWS services as use cases evolve. No cloud expertise is needed.
By using Amplify, we can build the React application with authentication by using cognito userpool and policy access control to AWS
cloudwatch evidentlyby cognito identity poolIn this post, we don't use CDK to provide Amplify components completely but adding Authentication component through Amplify studio (or you can use amplify cli)
First, create Amplify console with the following settings
Service role which Amplify requires permissions to deploy backend resources with your front end
GitHubSourceCodeProviderconnects amplify to github repositoryaws-cloudwatch-evidently-react. Note that, Amplify already supports GitHub App to authorize access to repositories for CI/CD workflows with the least privilege.buildSpecdefines backend and frontend build phases
Source code: amplify-console.ts
Deploy
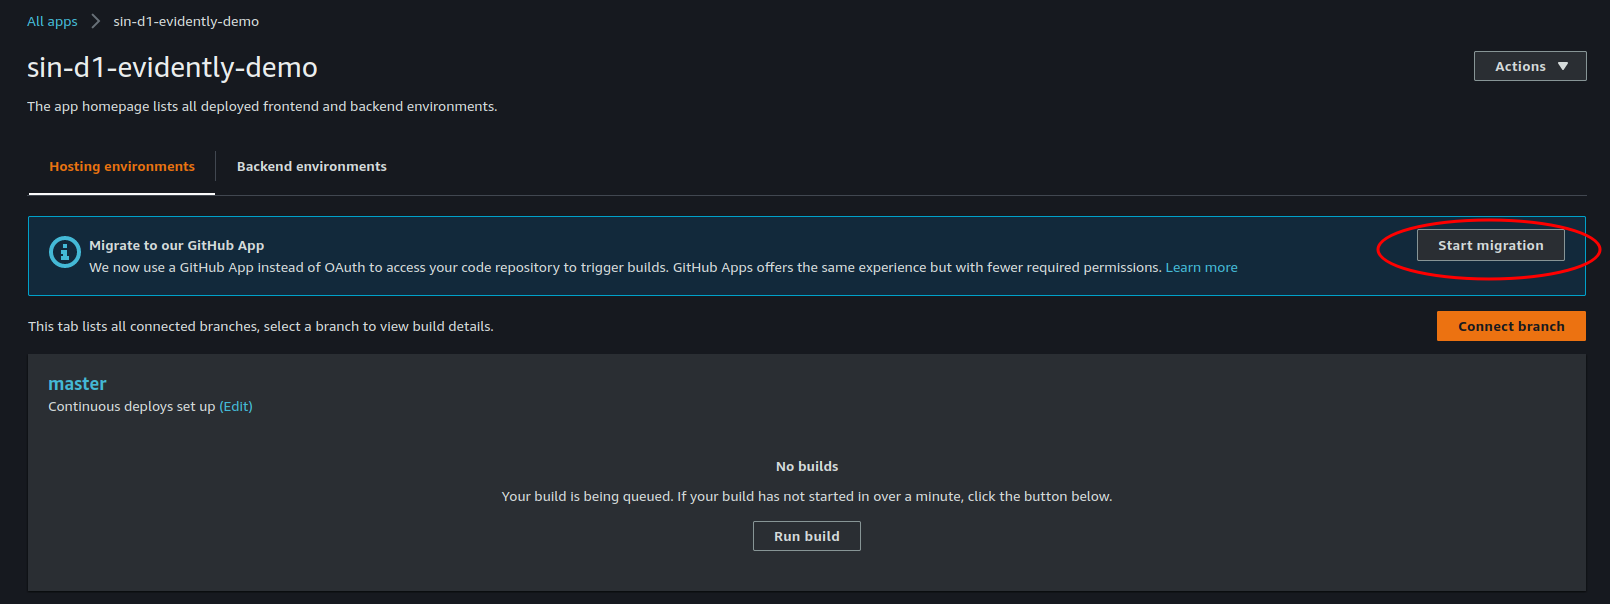
cdk deploy AmplifyConsoleReactStack --profile mfaAfter deploy done, the following steps to setup the backend and deploy the build FE app
- We should start the migration to
Install and authorize GitHub App
- We should start the migration to
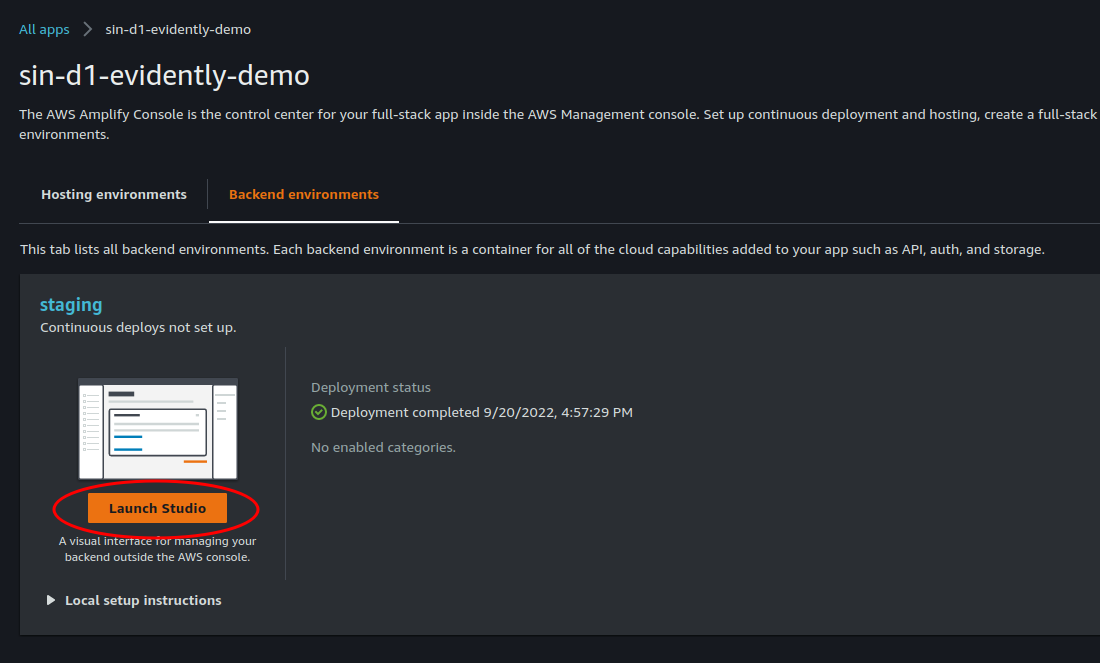
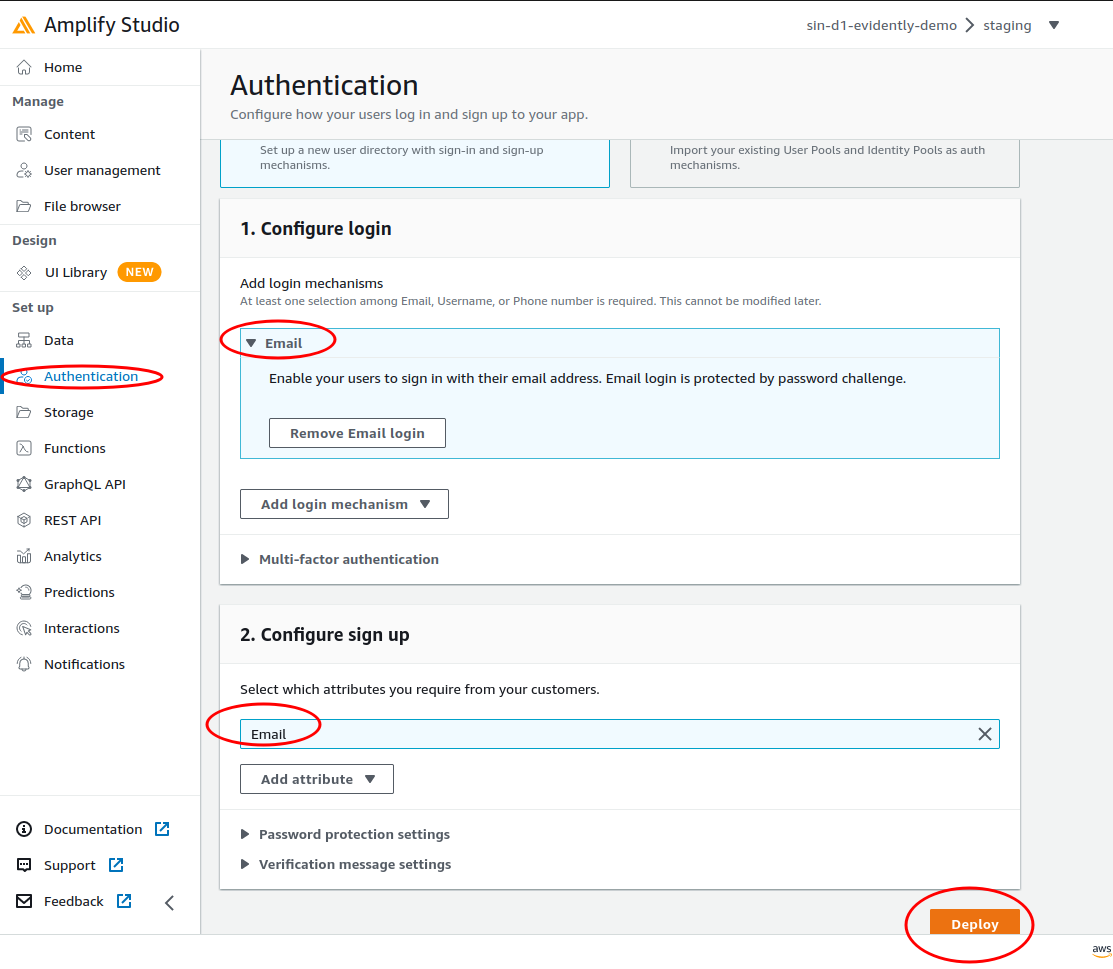
- Launch
Backend environmentsstudio to addAuthenticationcomponent
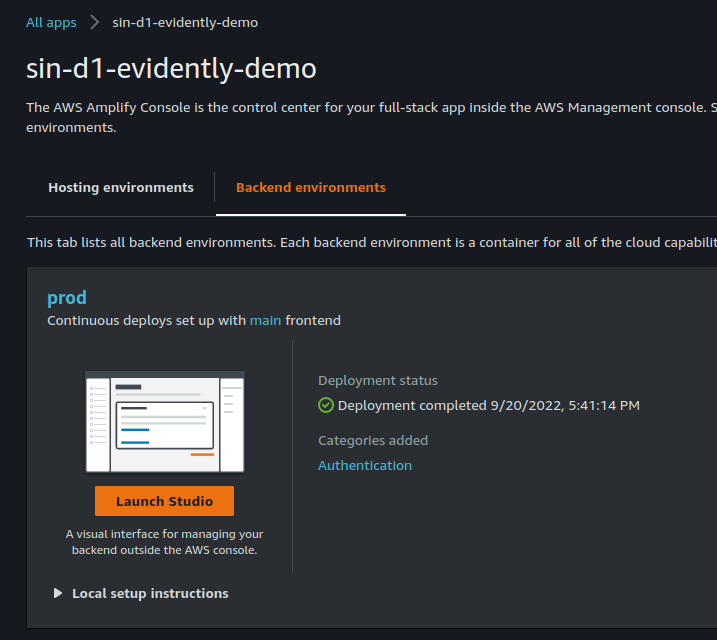
- Clone backend staging to
prodand associatemainbranch withprodbackend
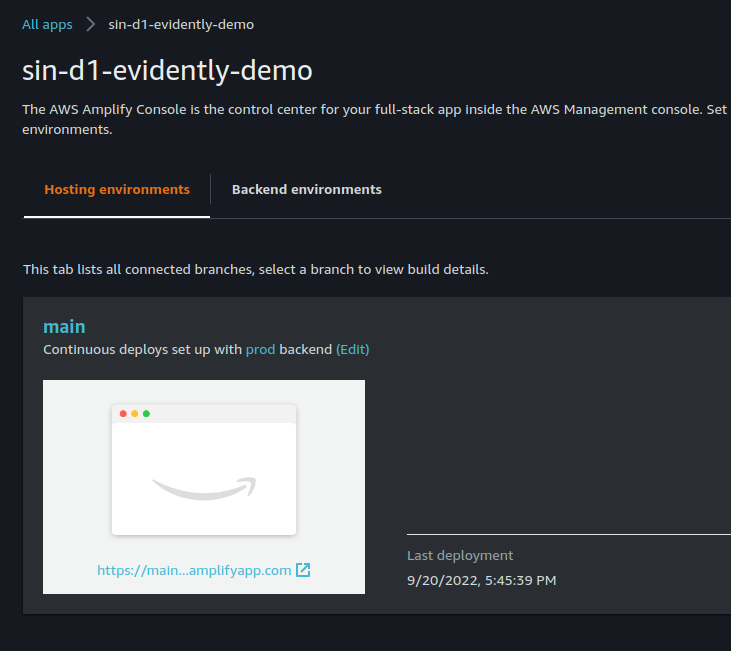
- Trigger build FE with the
mainbranch, after the build we will have the URL to access react app
- Let's have a look at react app source code to see how we create
Evidentlyclient is to sendevaluateFeatureRequestto the project andputProjectEventsfor custom metric as an experiment
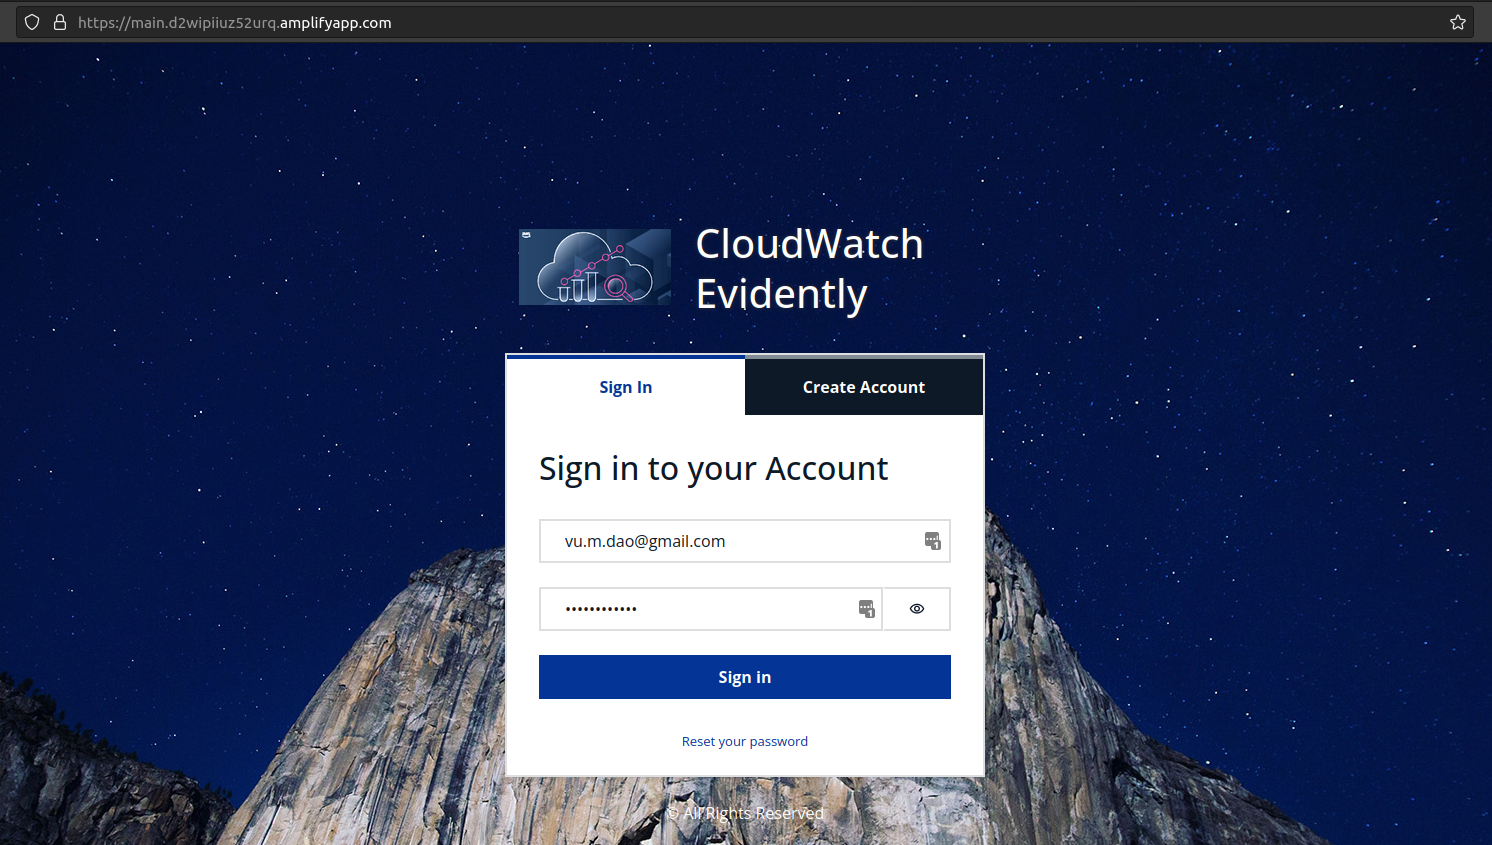
🚀 Test evidently feature
After creating an account and login successfully we will see the following error
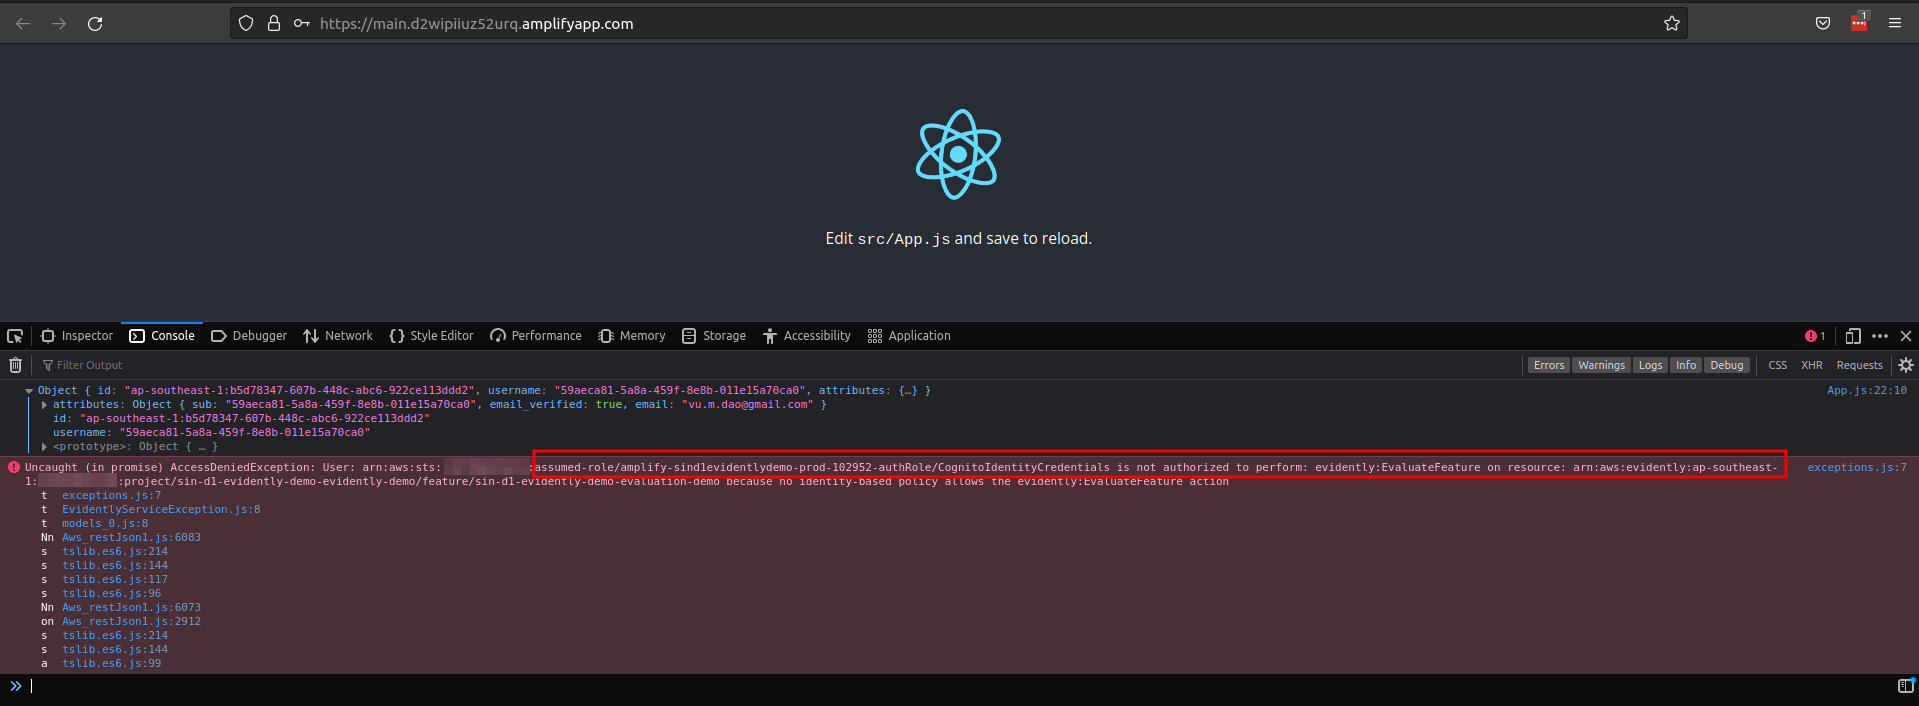
It's due to the identity pool default Authenticated role which is assumed by cognito userpool does not have permission to work with Cloudwatch evidently, we need to provide
AmazonCloudWatchEvidentlyFullAccessand also S3 permission to push data event storage to S3 bucket. To limit the application permission towardcloudwatch evidently, read Actions, resources, and condition keys for Amazon CloudWatch Evidently to create proper policy for the role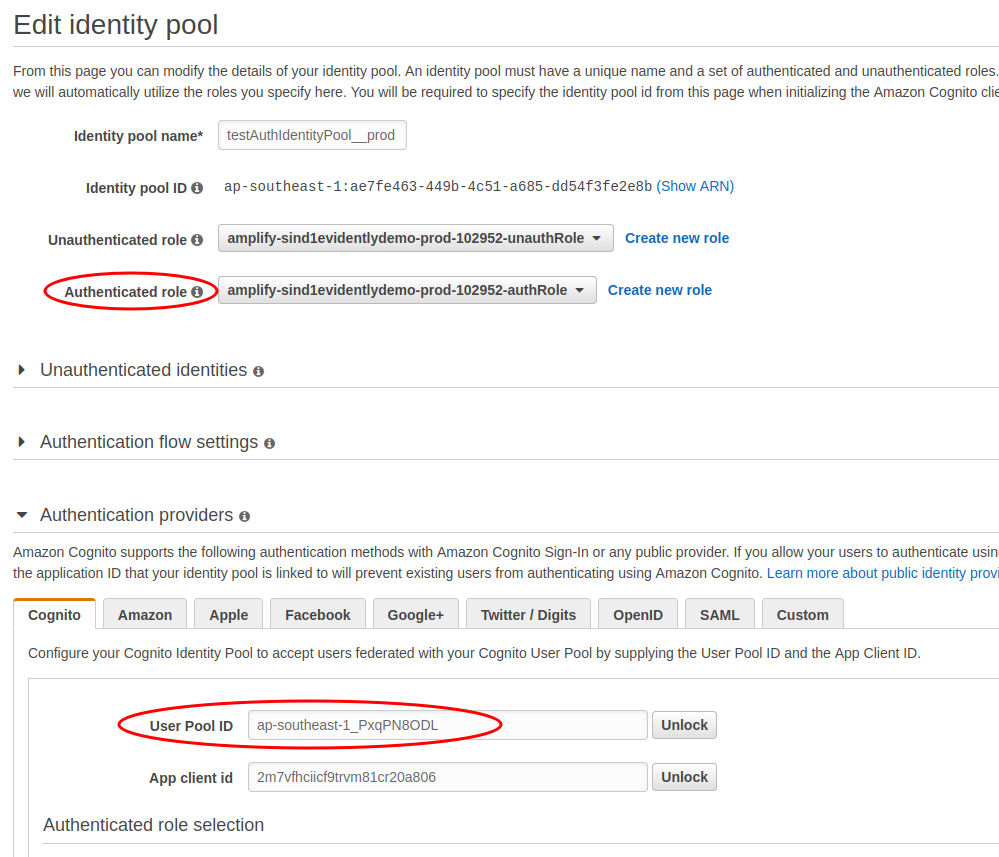
Successful load with evaluation routed to
Variation1with valuefalse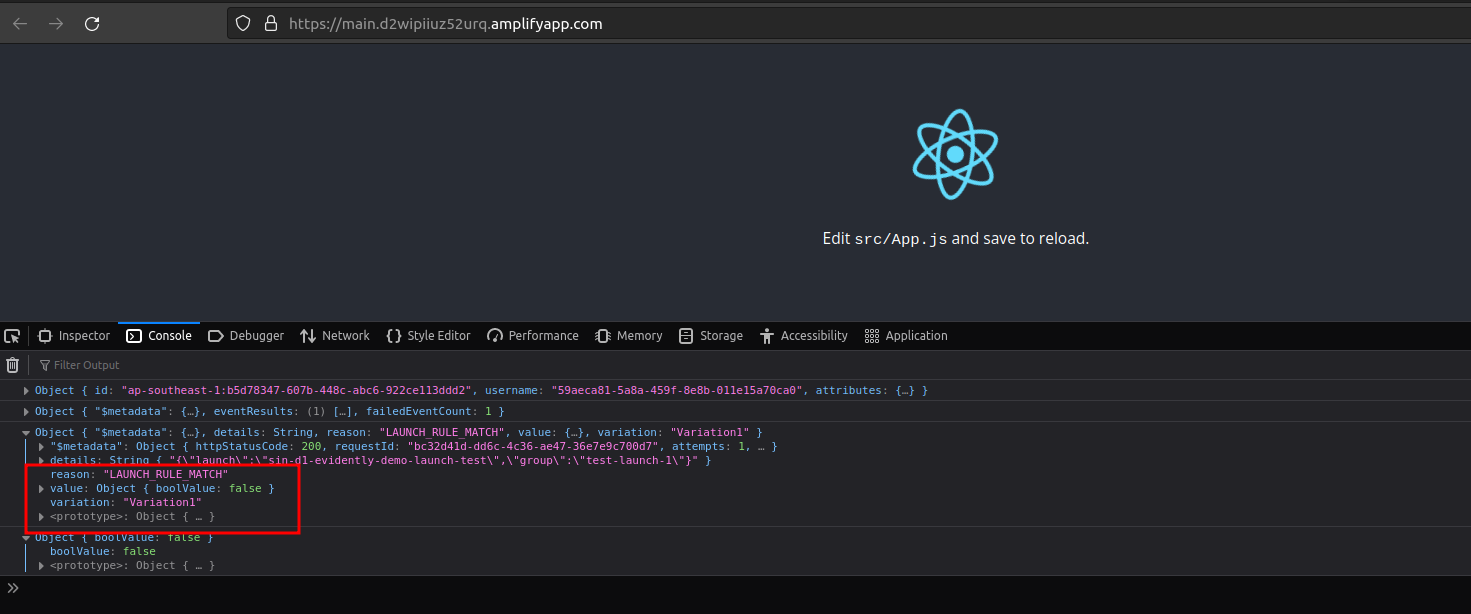
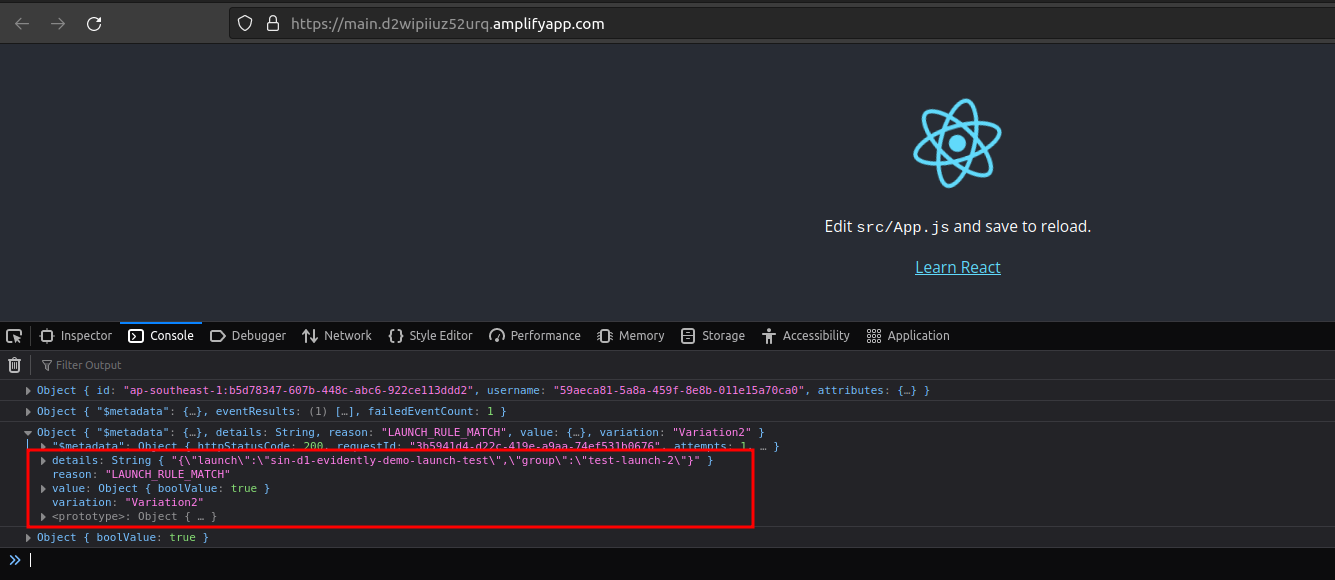
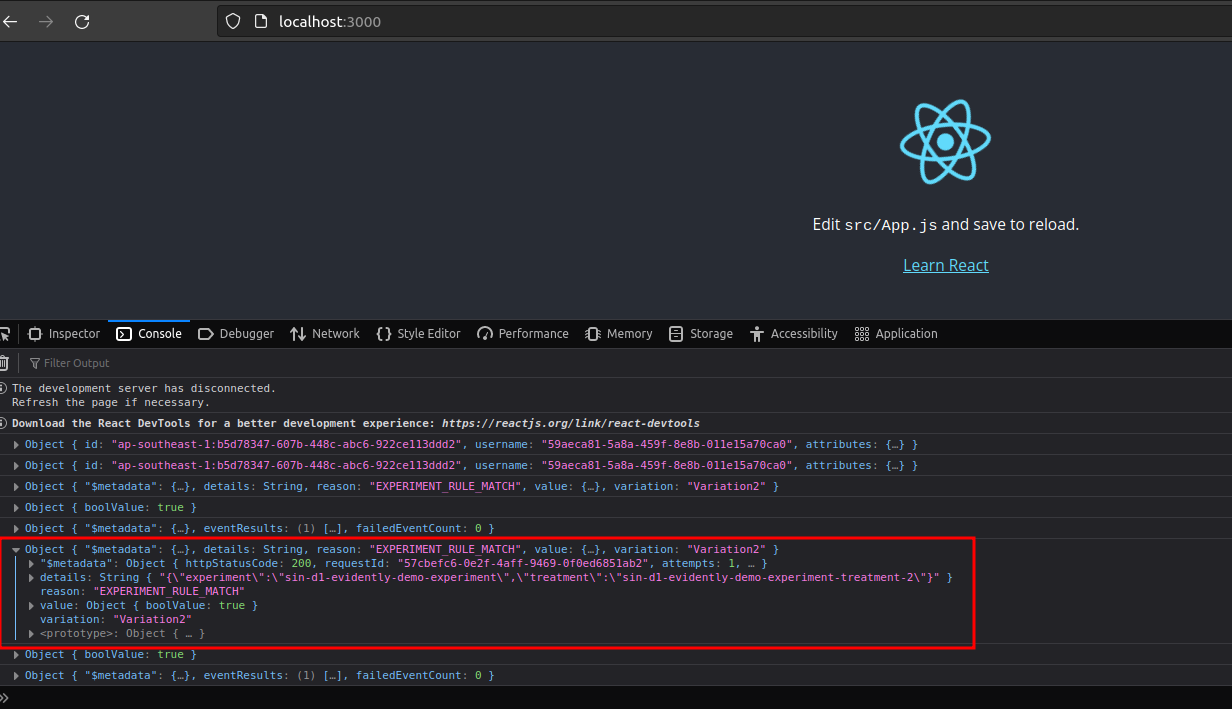
Switch app to experiment feature
🚀 Conclusion
With CDK, we can provision
cloudwatch evidentlyusing infrastructure as code and can update, modify or create a new project, feature, launch, and experiment though cdk pipelineWe make a demo using Amplify to react app easily and improve security using cognito userpool and cognito identity pool through the access token and role attached.
In a practice where we don't use amplify, we can inherit the flow of the above authentication as best practice.
References: