AWS CDK Redshfit Demo
Abstract
- For getting started with AWS Redshift, this post guides you to provide Redshift cluster and all necessary other resources such as VPC, redshift IAM role, S3 bucket where we load data to Amazon Redshift and a small EC2 instance as PostgreSQL client using AWS CDK typescript.
Table Of Contents
🚀 AWS Redshift overview
AWS Redshift is a cloud-based petabyte-scale data warehouse service offered as one of Amazon’s ecosystem of data solutions.
Based on PostgreSQL, the platform integrates with most third-party applications by applying its ODBC and JDBC drivers.
Amazon Redshift delivers fast query performance by using columnar storage technology to improve I/O efficiency and parallelise queries across multiple nodes
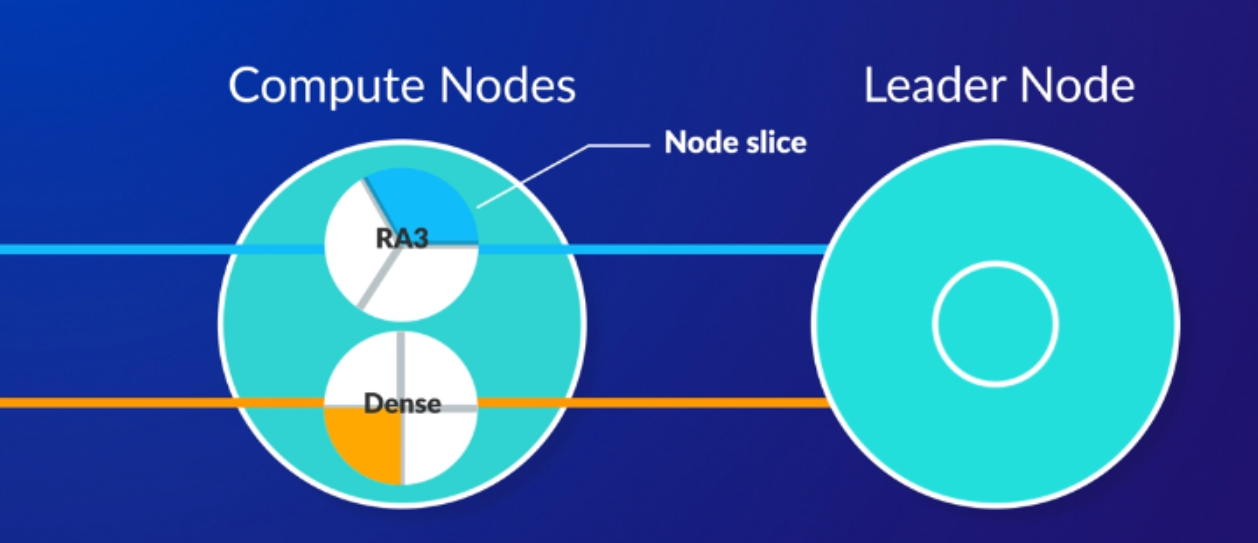
Redshit cluster overview
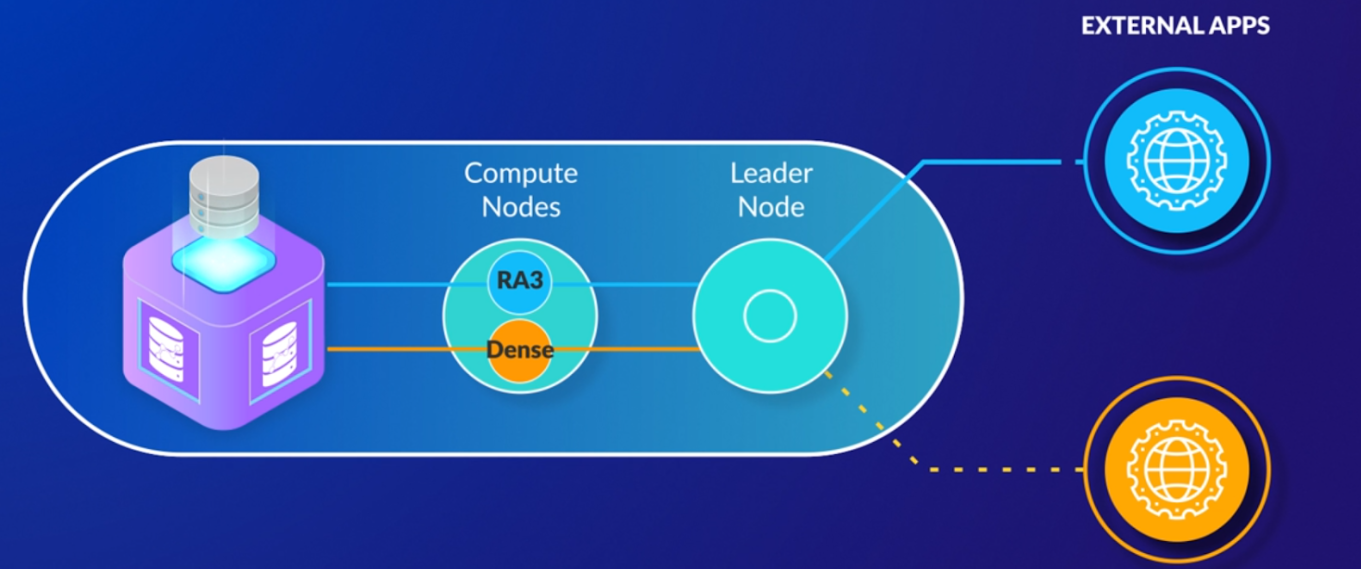
Node slices in compute nodes
🚀 Redshift cluster stacks
The Redshift cluster is in VPC and under a private subnet and security group, so we first create the VPC stack, and for saving cost, max
availabilityZonesis set to 1const vpc = new Vpc(this, `${prefix}-vpc`, { vpcName: `${prefix}-vpc`, maxAzs: 1 });We will use S3 bucket to store JSON/parquet data and then load data from S3 bucket to redshift cluster as the following flow.
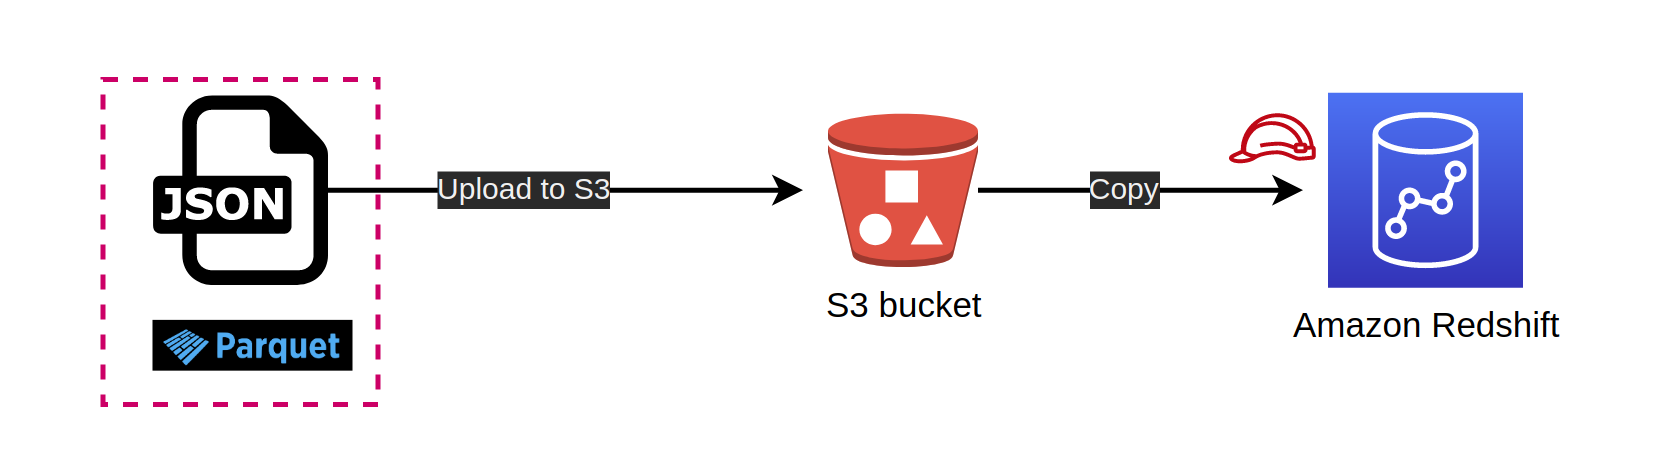
Redshift needs a role so that it can consume that role to download data from S3 bucket
  const s3 = new Bucket(this, `${prefix}-data-ingest`, {
    bucketName: `${prefix}-data-ingest`,
    encryption: BucketEncryption.S3_MANAGED,
    removalPolicy: RemovalPolicy.DESTROY,
    enforceSSL: true,
    blockPublicAccess: BlockPublicAccess.BLOCK_ALL
  });

  const role = new Role(this, `${prefix}-role`, {
    roleName: `${prefix}-role`,
    assumedBy: new ServicePrincipal('redshift.amazonaws.com')
  });
  s3.grantRead(role);
In this post, the redshift cluster is in multi-node cluster with 2 compute nodes type
DC2_LARGE(as default).masterUseris created with password stored in the secret manager (as the default option)const cluster = new Cluster(this, `${prefix}-cluster-demo`, { clusterName: `${prefix}-demo`, vpc: vpc, masterUser: { masterUsername: 'admin' }, numberOfNodes: 2, clusterType: ClusterType.MULTI_NODE, removalPolicy: RemovalPolicy.DESTROY, roles: [role] });Finally, it's optional to create an EC2 instance as postgresql client to access redshift database (as we can use Amazon Redshift query editor). In practice, the application will use JDBC URL to connect to Redshift cluster in a private network. Back to the EC2 instance, it requires the following:
Only small instance types such as
t3.smallAllocated in the private subnet of redshift VPC
Attached Security Group of the redshift cluster which already allows internal communication
Instance profile with only
AmazonSSMManagedInstanceCoreto start Amazon SSM agentAnd
user-data.shscript to install postgresql at first start
      const clusterSg = cluster.connections.securityGroups[0];
      clusterSg.addIngressRule(clusterSg, Port.allTcp(), "Allow internal access Redshift");

      const ec2 = new Instance(this, `${prefix}-psql`, {
        instanceName: `${prefix}-psql`,
        vpc: vpc,
        securityGroup: clusterSg,
        instanceType: InstanceType.of(InstanceClass.T3, InstanceSize.SMALL),
        machineImage: new AmazonLinuxImage({generation: AmazonLinuxGeneration.AMAZON_LINUX_2}),
        role: new Role(this, `${prefix}-ec2-ssm`, {roleName: `${prefix}-ec2-ssm`, assumedBy: new ServicePrincipal('ec2.amazonaws.com'), managedPolicies: [{managedPolicyArn: 'arn:aws:iam::aws:policy/AmazonSSMManagedInstanceCore'}]})
      });

      const userData = readFileSync(resolve(__dirname, './user-data.sh'), 'utf8');
      ec2.addUserData(userData);
🚀 Deploy stacks
The infrastructure of code for this project is ready we now deploy the stacks. It's up to you to use
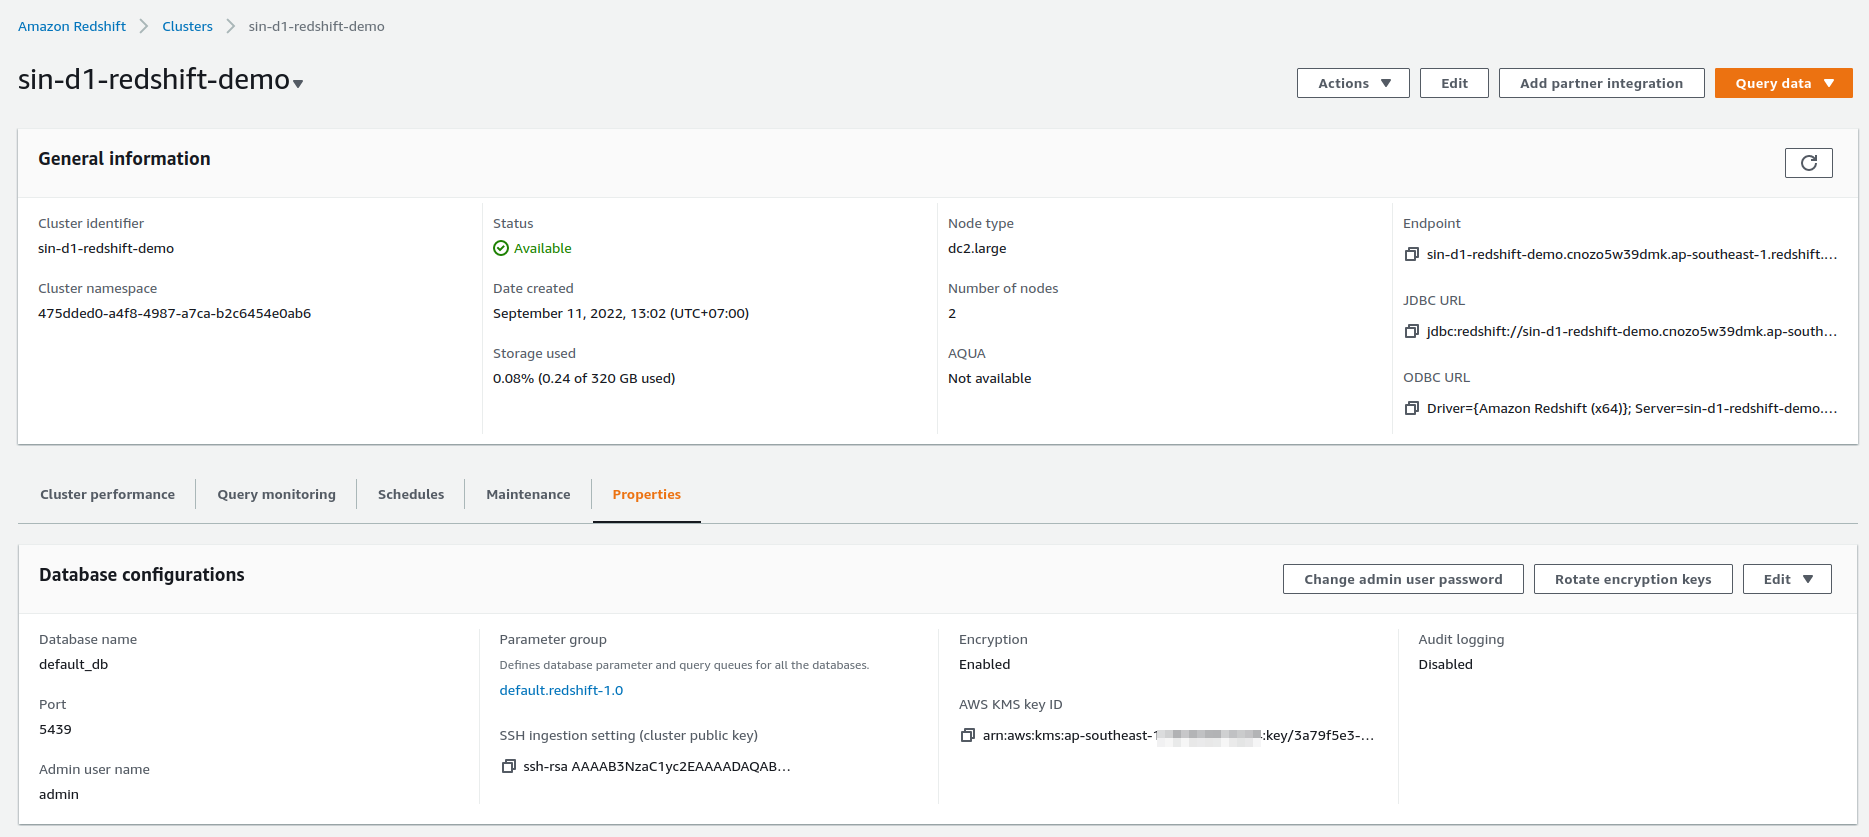
concurrencyoption for fasten deployment andrequire-approvalto bypass confirmation of creating/updating/removing sensitive things.cdk deploy --concurrency 2 --require-approval neverCheck redshift cluster
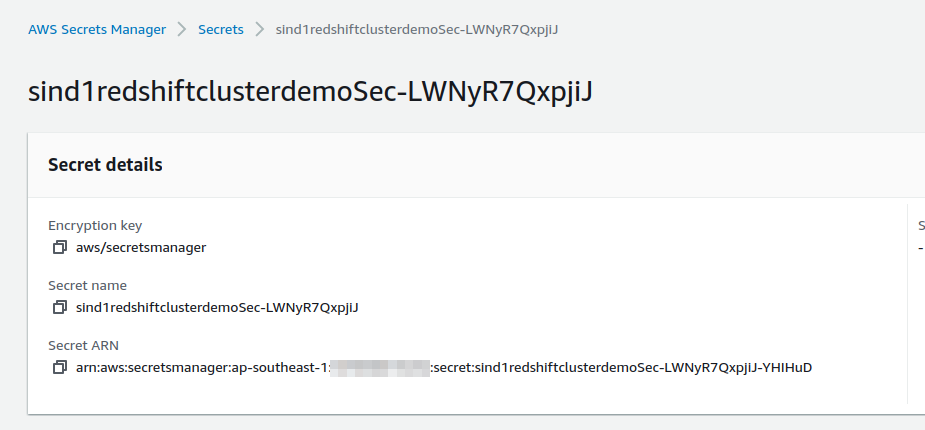
Go to the secret manager to get the master user password
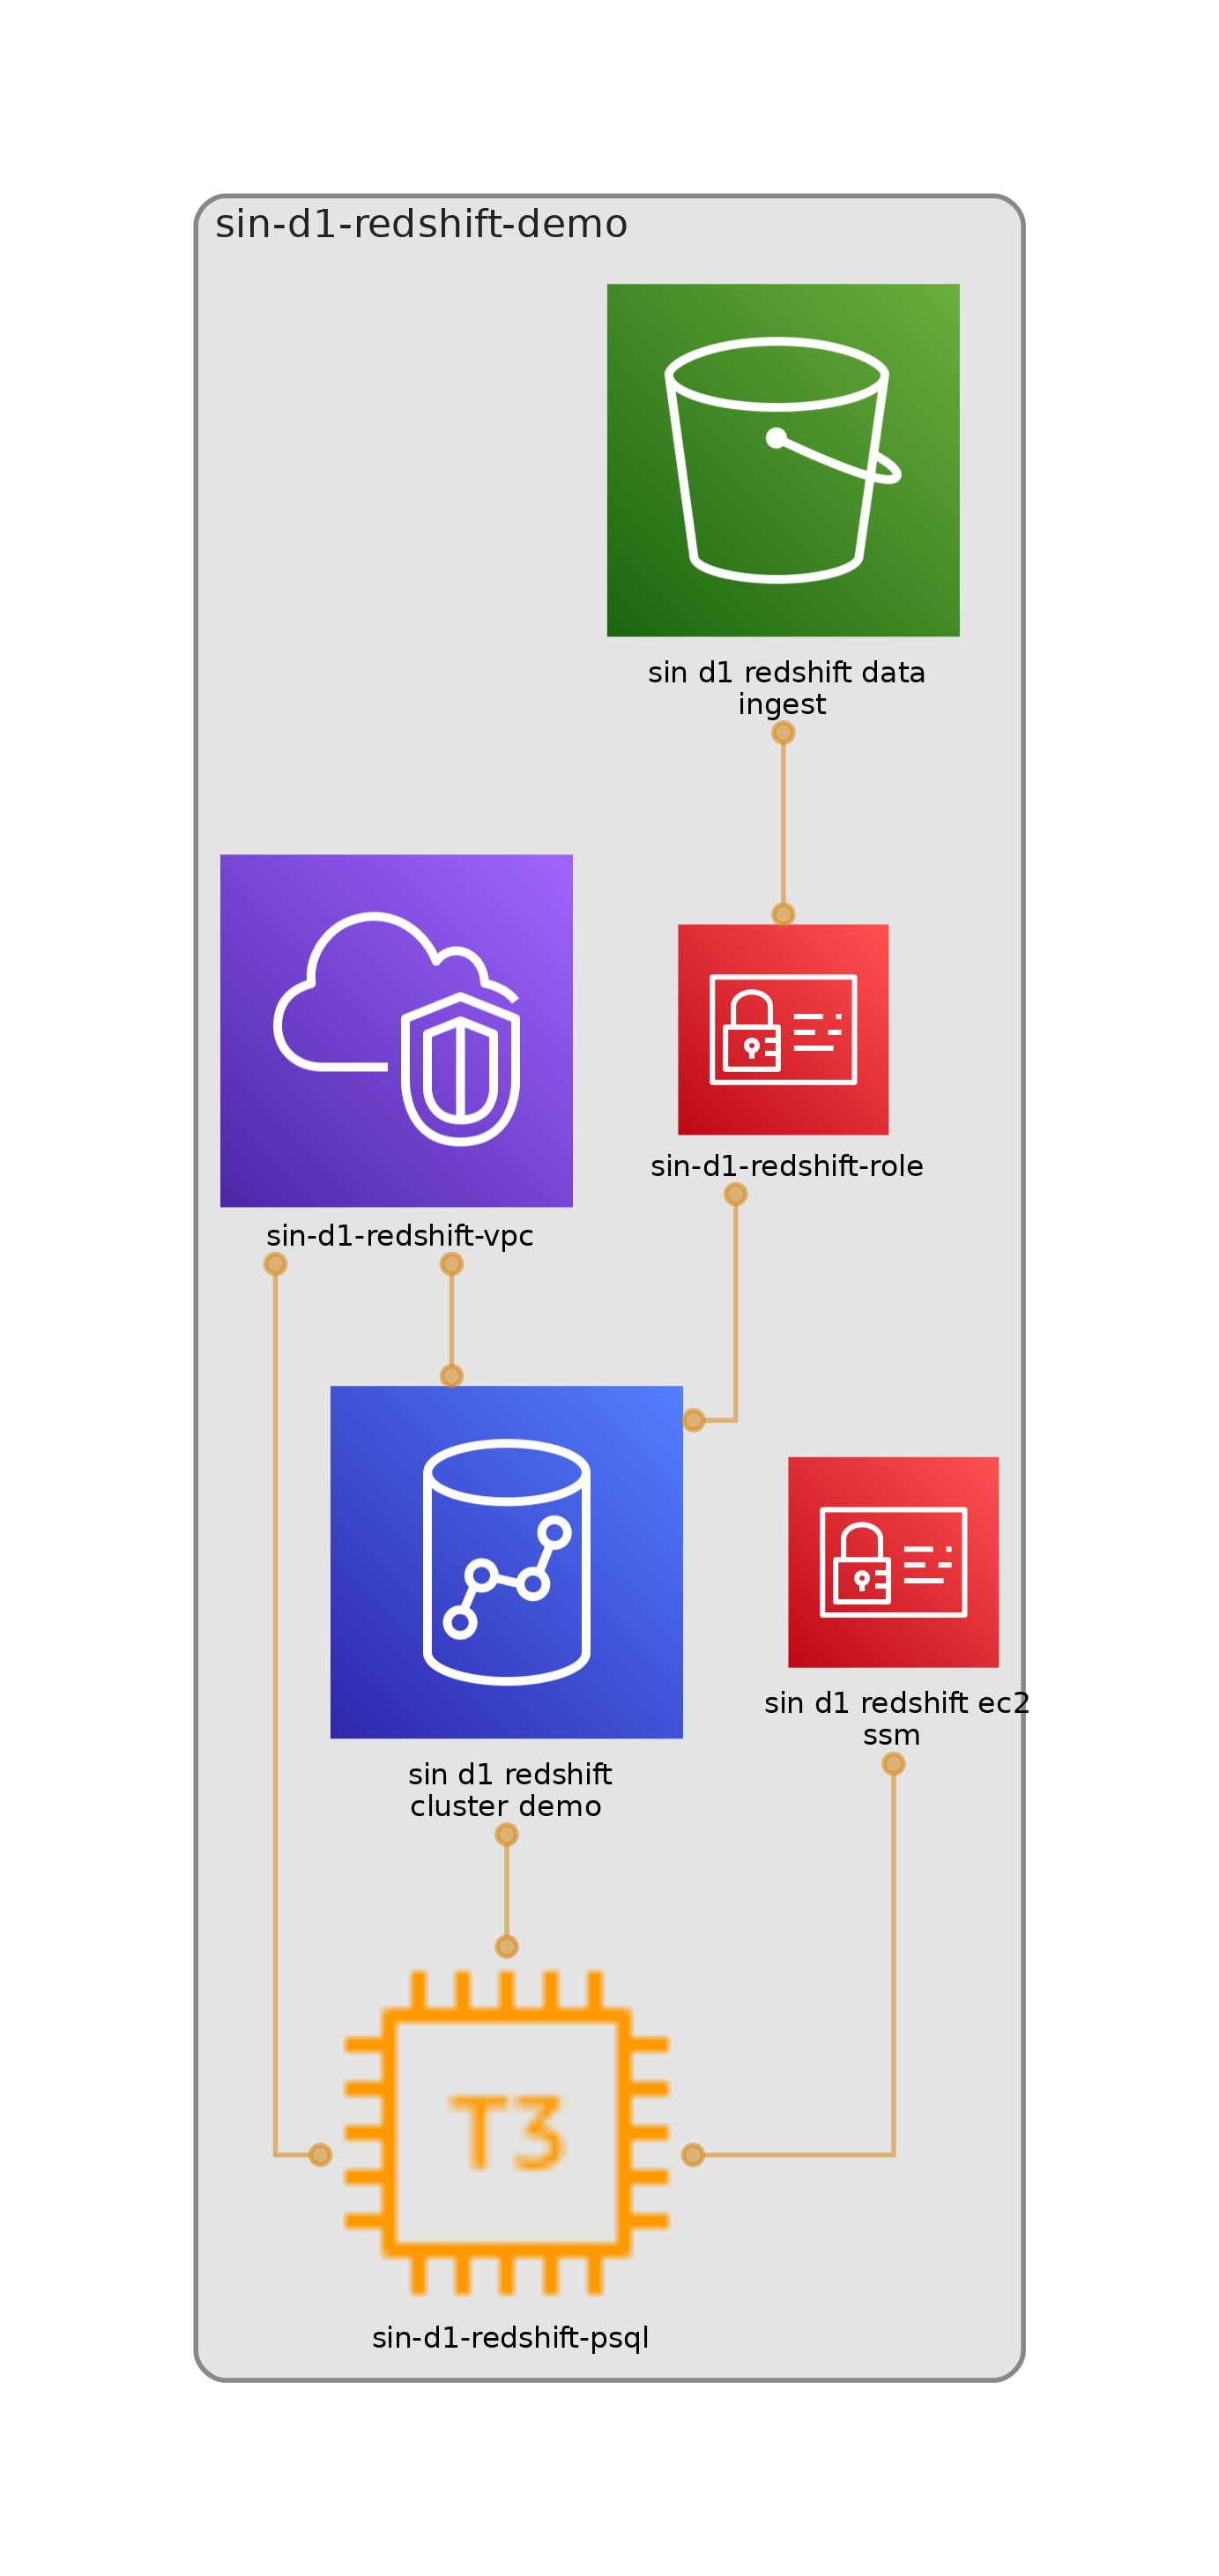
Overview of all components
🚀 Working with Redshift Cluster
We use sample data in data_sample/amzn_reviews_en.json, you can find more in Amazon review data (2018)
From the JSON file, we use
pysparkto convert it to parquet formatOverview of Parquet: Parquet follows the Columnar Storage Model and is available to any project in the Hadoop Ecosystem. Unlike the traditional Sequential Storage Model where data is written in sequence, the Columnar Storage Model stores column values together. Although the Sequential Storage Model has advantages in processing transactions, it is not suitable for running Analytical Queries on Big Data.
Install
pysparkby runningpip install pyspark. Note that it also requires java openjdk to use the toolCovert JSON file to parquet.
  ⚡ $ cd data_sample/
  ⚡ $ pyspark
  Python 3.10.4 (main, Jun 29 2022, 12:14:53) [GCC 11.2.0] on linux
  Welcome to
        ____              __
      / __/__  ___ _____/ /__
      _\ \/ _ \/ _ `/ __/  '_/
    /__ / .__/\_,_/_/ /_/\_\   version 3.3.0
        /_/
  >>> df = spark.read.json("amzn_reviews_en.json")
  >>> print("Schema: {}".format(df.schema))
  >>> df.show()
  >>> df.write.parquet("amzn_reviews_en.parquet")
Access the EC2 instance by using the SSM session
~ $ aws ssm start-session --target i-0be265f7c54177548 --region ap-southeast-1Connect redshift cluster database
  [root@ip-10-0-147-8 bin]# psql -h sin-d1-redshift-demo.cnozo5w39dmk.ap-southeast-1.redshift.amazonaws.com -U admin -p 5439 -d default_db
  Password for user admin:
  psql (10.17, server 8.0.2)
  SSL connection (protocol: TLSv1.2, cipher: ECDHE-RSA-AES256-GCM-SHA384, bits: 256, compression: off)
  Type "help" for help.

  default_db=#
  default_db=# \c prodreview
  prodreview=#
Create JSON table view
  CREATE TABLE IF NOT EXISTS product_reviews_json(
  review_id           varchar(100)        NOT NULL distkey sortkey,
  product_id          varchar(100)        NOT NULL,
  stars               varchar(18)         NOT NULL,
  review_body         varchar(10000)      NOT NULL,
  review_title        varchar(1000)       NOT NULL,
  reviewer_id         varchar(128)        NOT NULL,
  language            varchar(20)         NOT NULL,
  product_category    varchar(100)        NOT NULL,
  primary key(review_id)
  );
Create a parquet table view
  CREATE TABLE IF NOT EXISTS product_reviews_parquet(
  language            varchar(20)         NOT NULL ENCODE lzo,
  product_category    varchar(100)        NOT NULL ENCODE lzo,
  product_id          varchar(100)        NOT NULL ENCODE lzo,
  review_body         varchar(10000)      NOT NULL ENCODE lzo,
  review_id           varchar(100)        NOT NULL distkey sortkey ENCODE lzo,
  review_title        varchar(1000)       NOT NULL ENCODE lzo,
  reviewer_id         varchar(128)        NOT NULL ENCODE lzo,
  stars               varchar(18)         NOT NULL ENCODE lzo,
  primary key(review_id)
  );
Upload data
amzn_reviews_en.jsonandamzn_reviews_en.parquetto S3 and then load them to redshift databaseLoad
amzn_reviews_en.jsonto the JSON tableprodreview=# copy product_reviews_json prodreview-# FROM 's3://sin-d1-redshift-data-ingest/amzn_reviews_en.json' prodreview-# IAM_ROLE 'arn:aws:iam::107858015234:role/sin-d1-redshift-role' prodreview-# json 'auto ignorecase'; INFO: Load into table 'product_reviews_json' completed, 5000 record(s) loaded successfully. COPYprodreview=# SELECT COUNT(*) FROM product_reviews_json; count ------- 5000 (1 row)Load
amzn_reviews_en.parquetto parquet tableprodreview=# copy product_reviews_parquet FROM 's3://sin-d1-redshift-data-ingest/amzn_reviews_en.parquet' IAM_ROLE 'arn:aws:iam::107858015234:role/sin-d1-redshift-role' format as parquet; INFO: Load into table 'product_reviews_parquet' completed, 5000 record(s) loaded successfully. COPYprodreview=# SELECT COUNT(*) FROM product_reviews_parquet; count ------- 5000 (1 row)Compare loading time
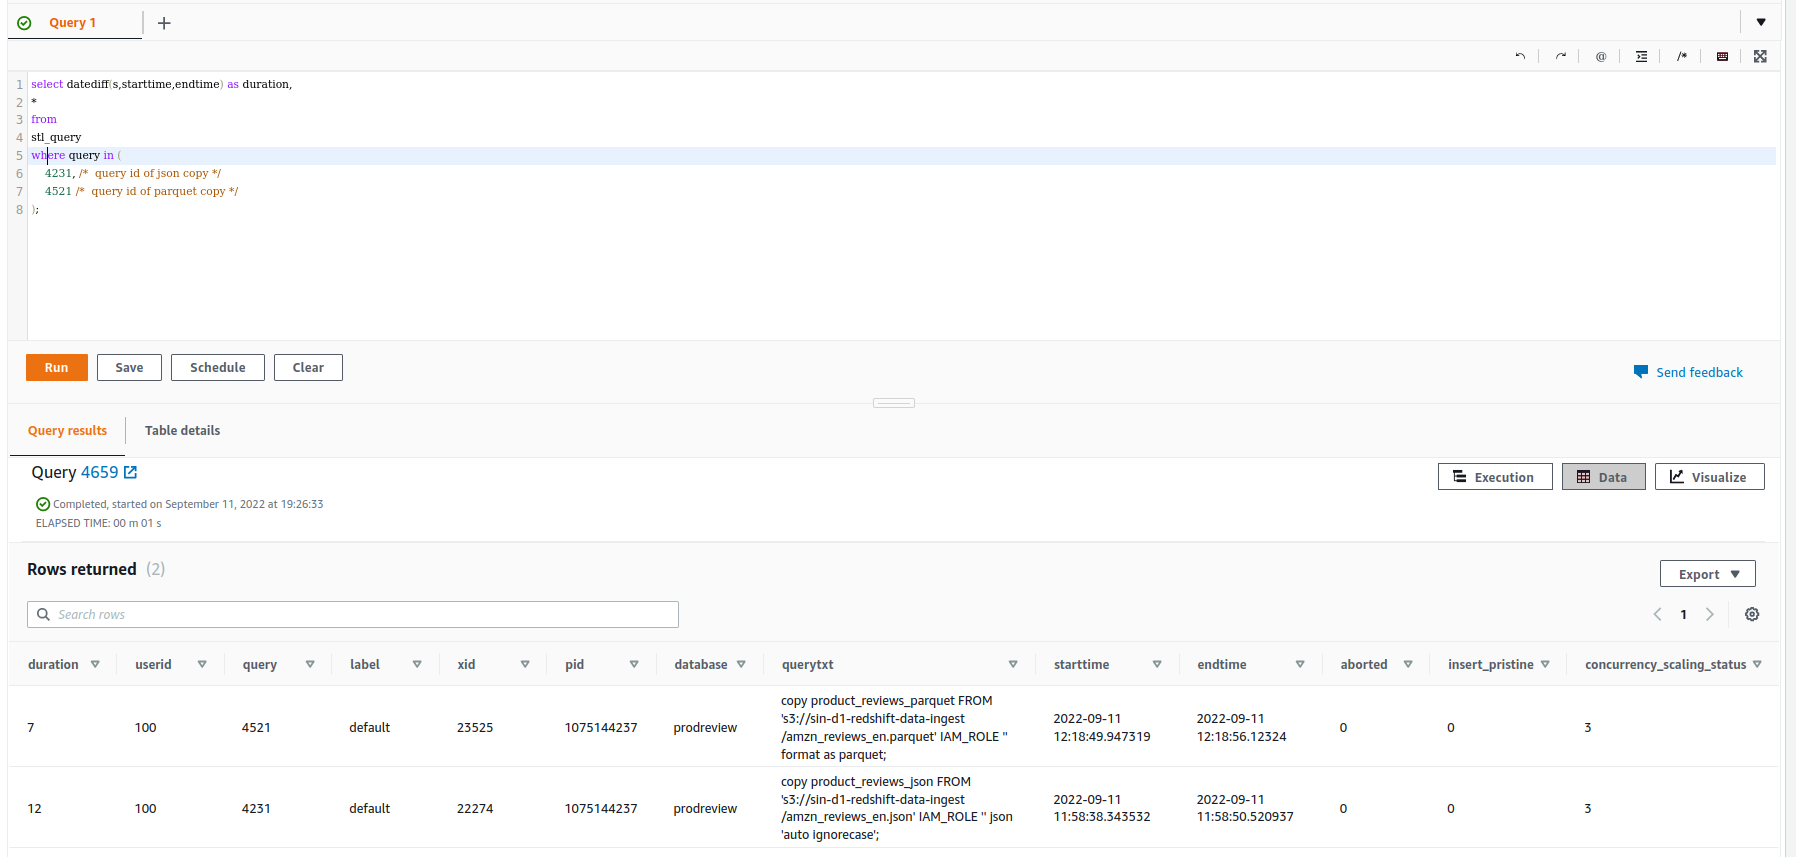
  select datediff(s,starttime,endtime) as duration,
  *
  from
  stl_query
  where query in (
      4231, /*  query id of json copy */
      4521 /*  query id of parquet copy */
  );
RUN QUERIES: query data for the question: "Do people who buy kitchen and grocery items leave higher ratings?"
  prodreview=# SELECT stars, COUNT(stars) total_ratings FROM product_reviews_json WHERE product_category='kitchen' or product_category='grocery'
  prodreview-# GROUP BY stars;
  stars | total_ratings
  -------+---------------
  5     |            92
  2     |            78
  4     |            63
  1     |            72
  3     |            66
  (5 rows)

  prodreview=# SELECT stars, COUNT(stars) total_ratings FROM product_reviews_parquet WHERE product_category='kitchen' or product_category='grocery'
  GROUP BY stars;
  stars | total_ratings
  -------+---------------
  3     |            66
  5     |            92
  2     |            78
  4     |            63
  1     |            72
  (5 rows)
🚀 Conclusion
Here we have demonstrated how to create a redshift cluster and its ETL using CDK typescript, you can update the cluster as well as add more S3 buckets or attach more roles to the redshift cluster for separate ETL processes through CDK stacks.
If you want to destroy all the resources created by the stack, simply run
cdk destroy --all